Hello again! This session of “Things a ServiceNow Developer Should Probably Know But May Not” we are going to cover how to properly make an M2M table. I’ve seen in countless deployments M2M’s setup incorrectly. This will lead to your company being charged for an additional custom table when an M2M should be free.
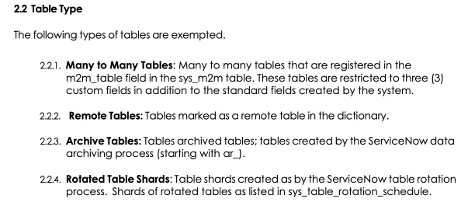
ServiceNow developers are allowed unlimited M2M tables if you follow 2 rules:
- Keep custom fields on those tables at 3 or under.
- Create the custom table by navigating to sys_m2m.list (If you create a normal table with two requirements this will not count)
Citation

The first requirement is to create an M2M from the ‘sys_m2m” table. You can navigate to there by going to into the navigator and typing ‘sys_m2m.list’ and hitting enter.

Next click on “New” then fill in the “From table” that will be your parent table. Then fill in the “To table” that’ll be the child. After that the rest of the fields will populate. Click on “Create Many to Many” and there you go. You now have a properly configured M2M.
Follow Up
You might want to take a look at some of your custom tables used in related lists. I’ve seen many times where admins created M2M’s by simply creating new tables and putting two references on it. While this will technically work as an M2M it will however cost you a table credit and potentially have your company pay more come license reup.

